How to Delete an IP Address on the API Dashboard
Last updated: October 6, 2026
This is a guide on how to remove an IP address from your whitelist in the Yellow Card API dashboard.
Deleting a whitelisted IP address revokes access for any device using that address to connect to your account. For security reasons, this action requires 2FA verification with a one-time code sent to your email.
Before you begin: log in to your dashboard with a role that allows you to manage developer settings, such as Administrator, and make sure you have access to the email address registered on your account.
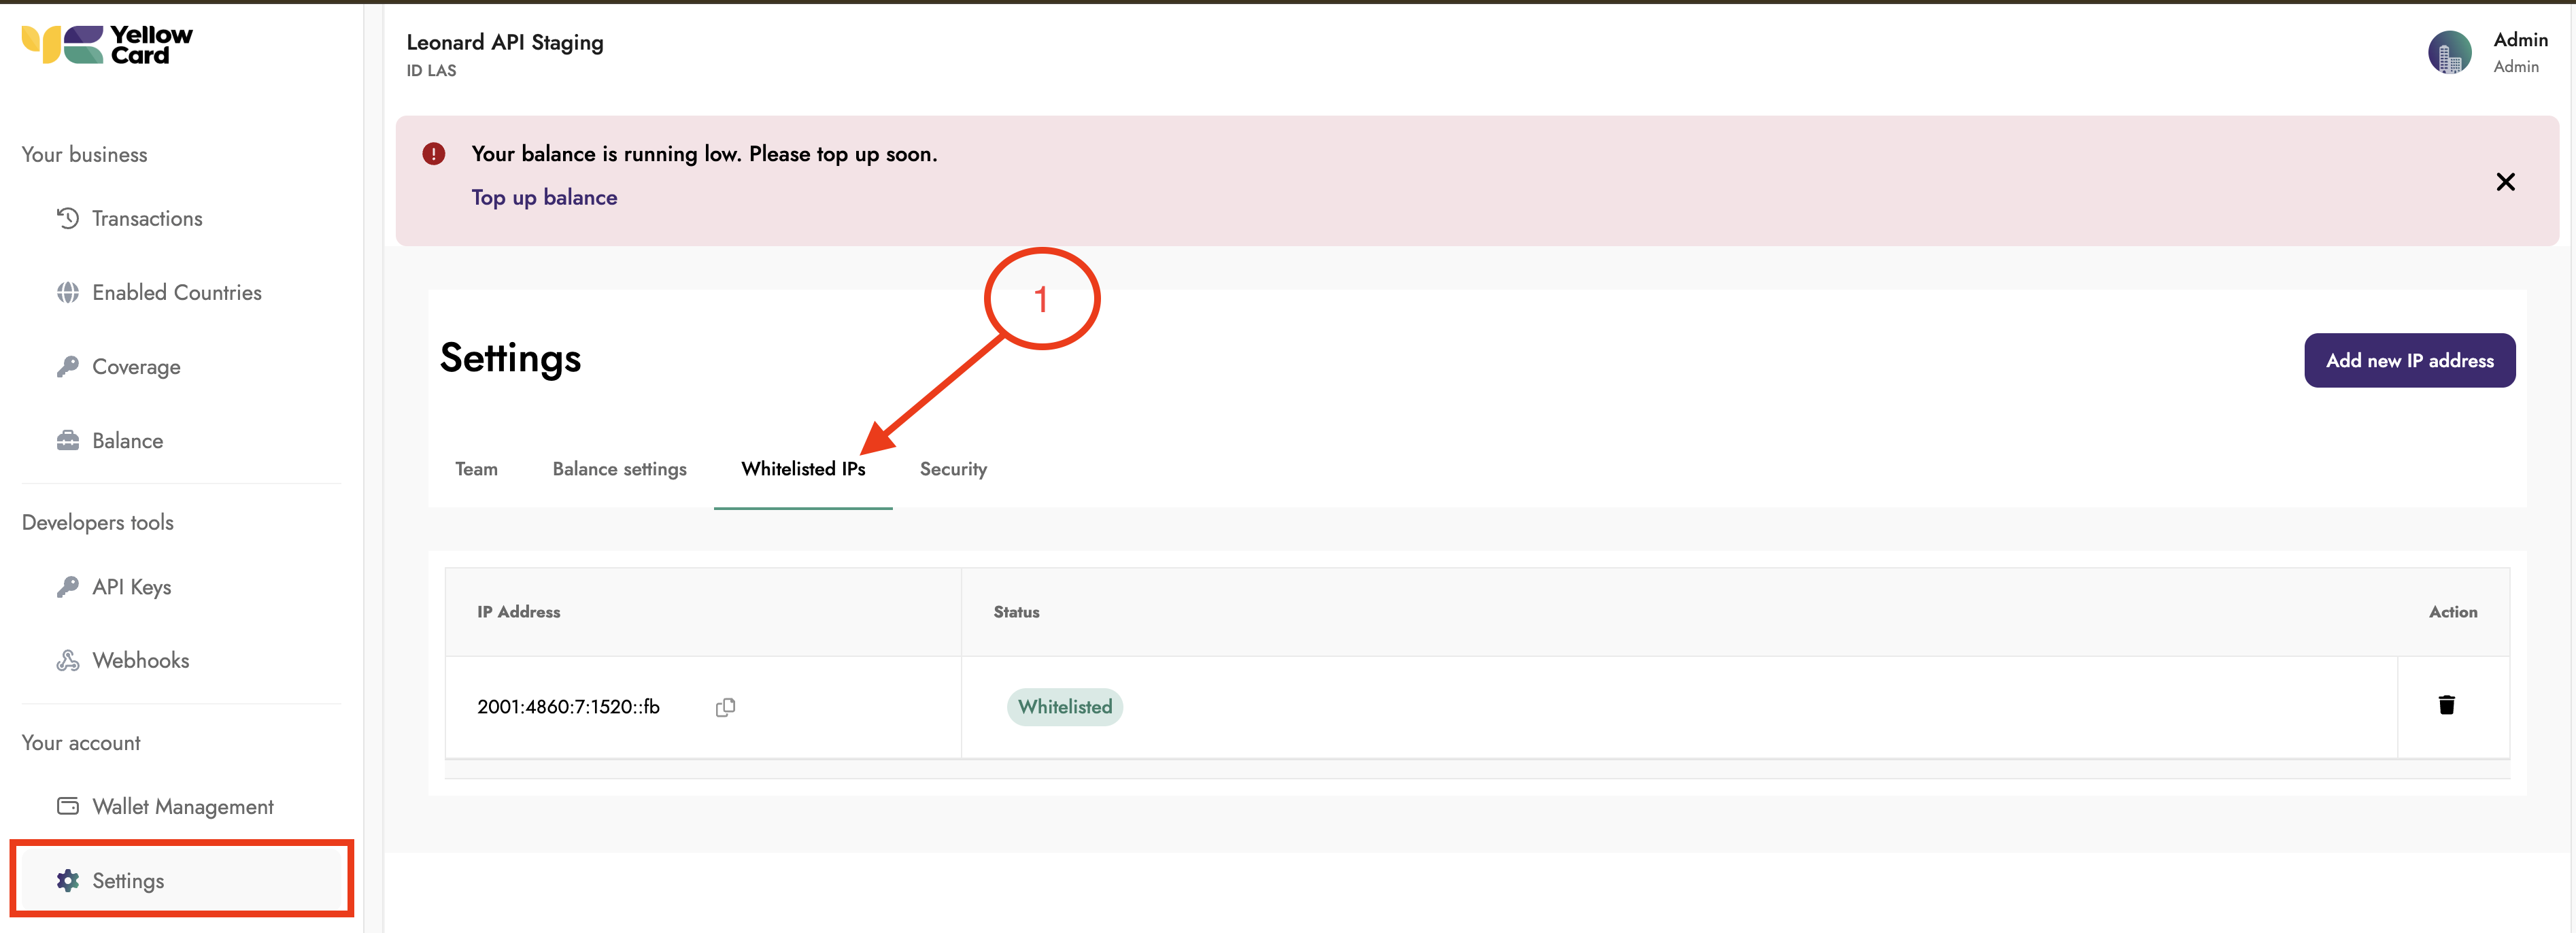
Log in to your API dashboard, then, in the left-hand menu under Developer tools, select Whitelisted IPs to see each whitelisted address listed with its IP Address, Status, and Action column.
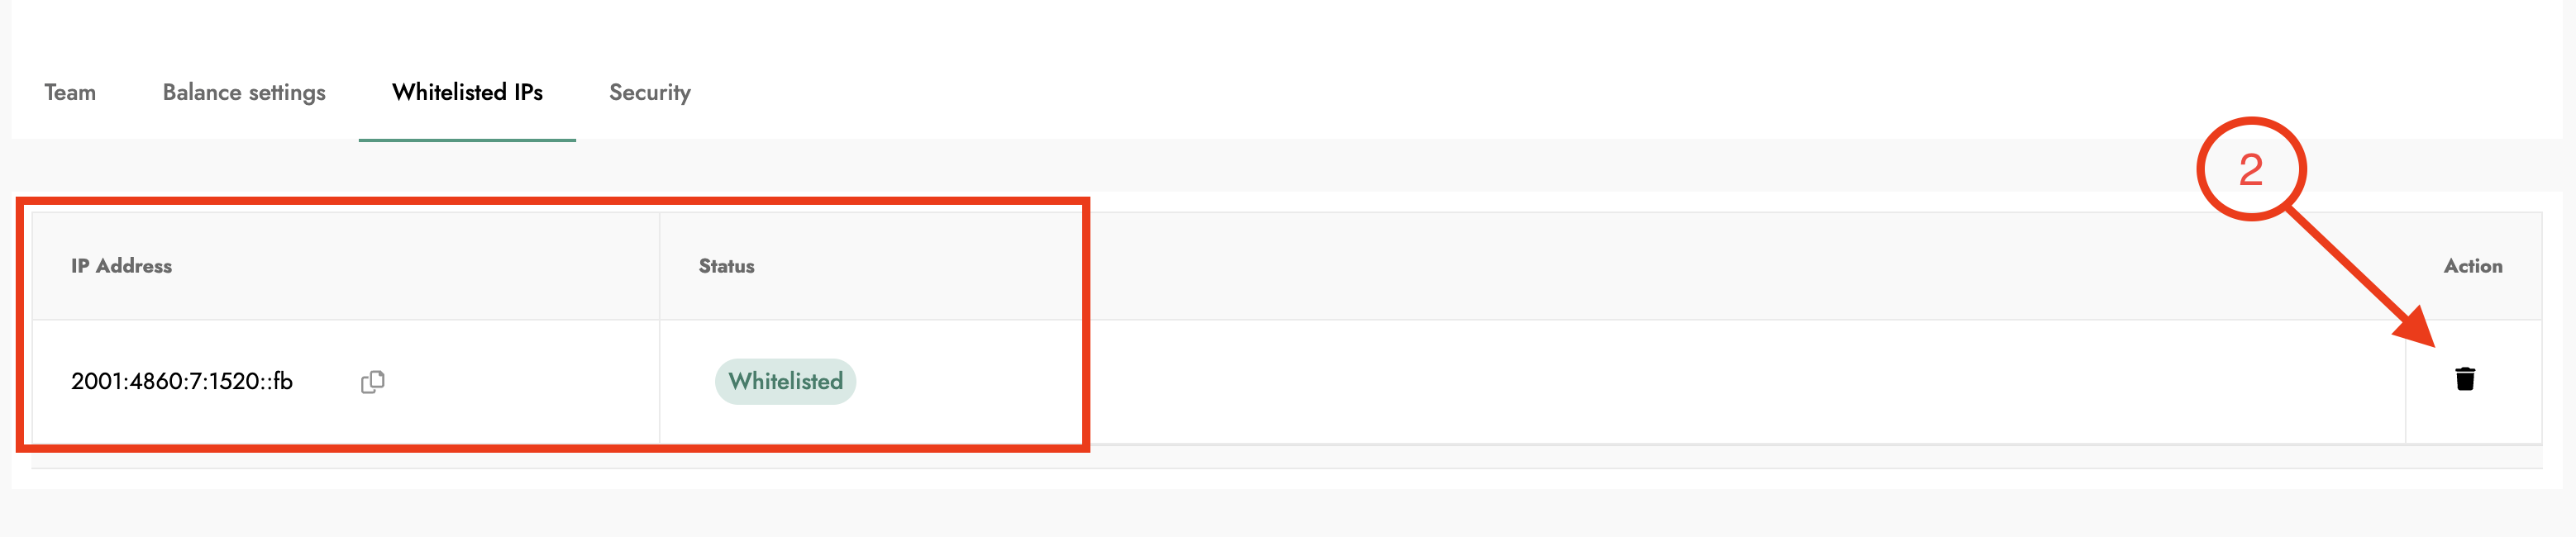
Find the IP address you want to remove in the table, and then, in the Action column at the far right of that row, click the delete (🗑) icon.
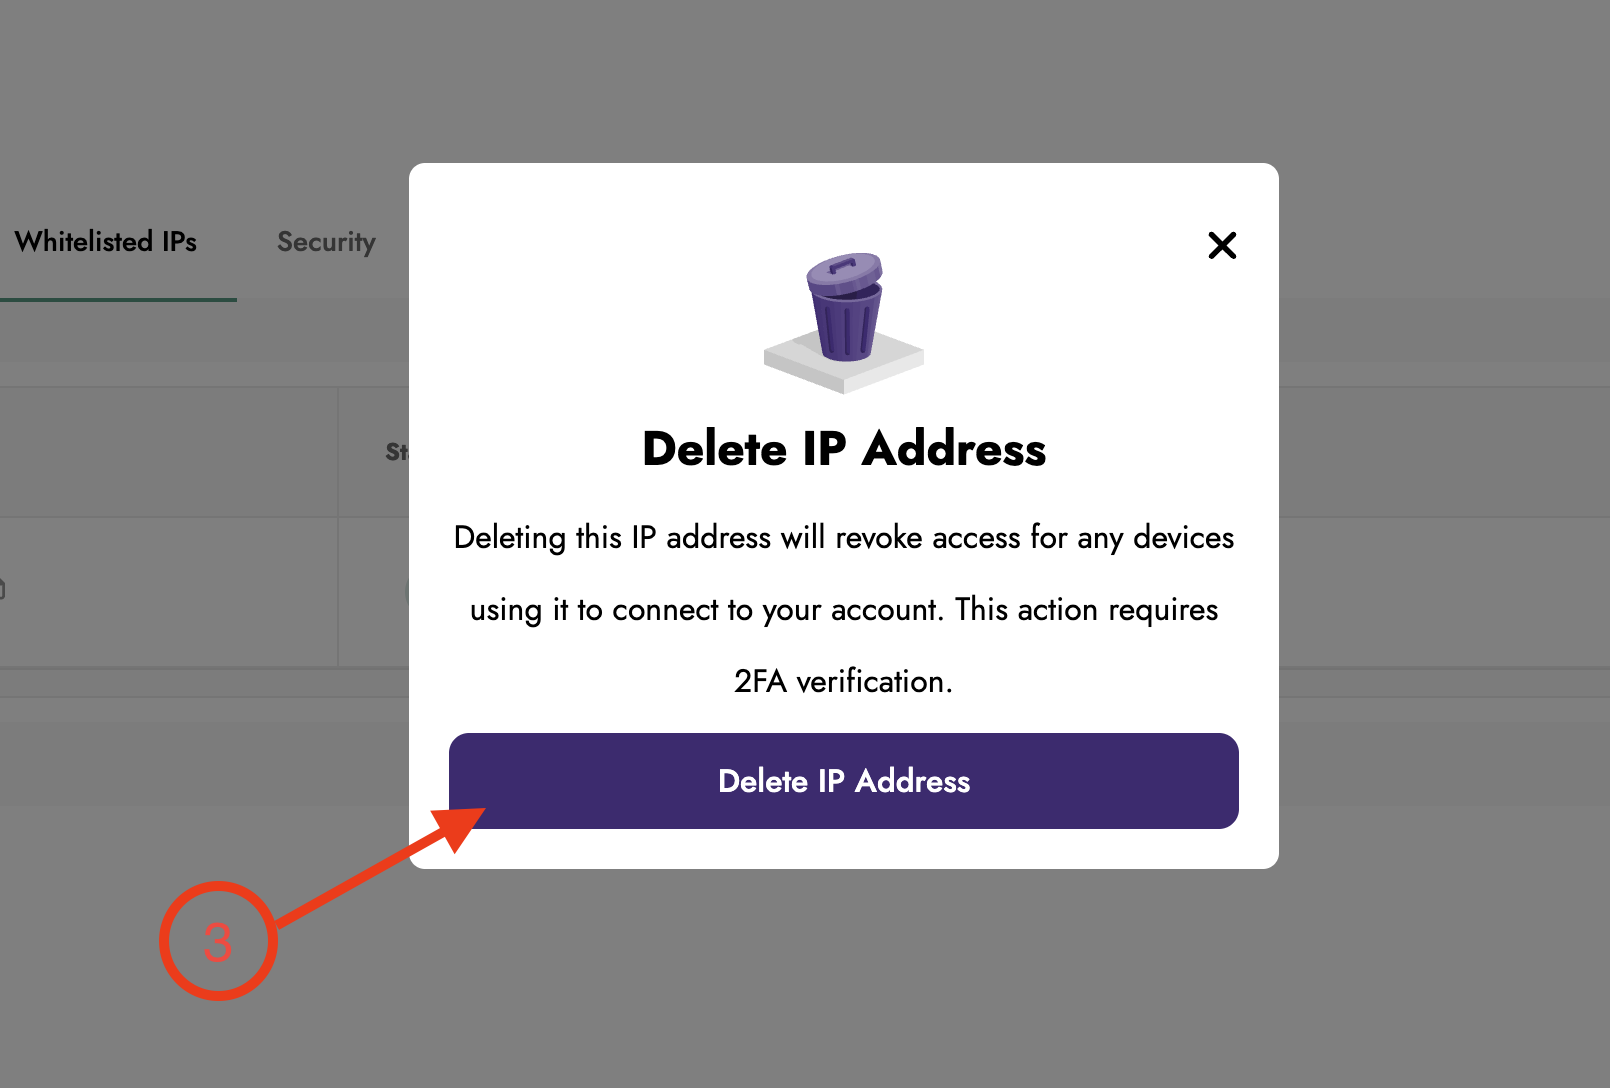
A pop-up titled "Delete IP Address?" appears, confirming the address and warning that any device using it will lose access to your account, so click "Delete IP Address" to continue, or click the X to close the pop-up if you no longer want to delete it.
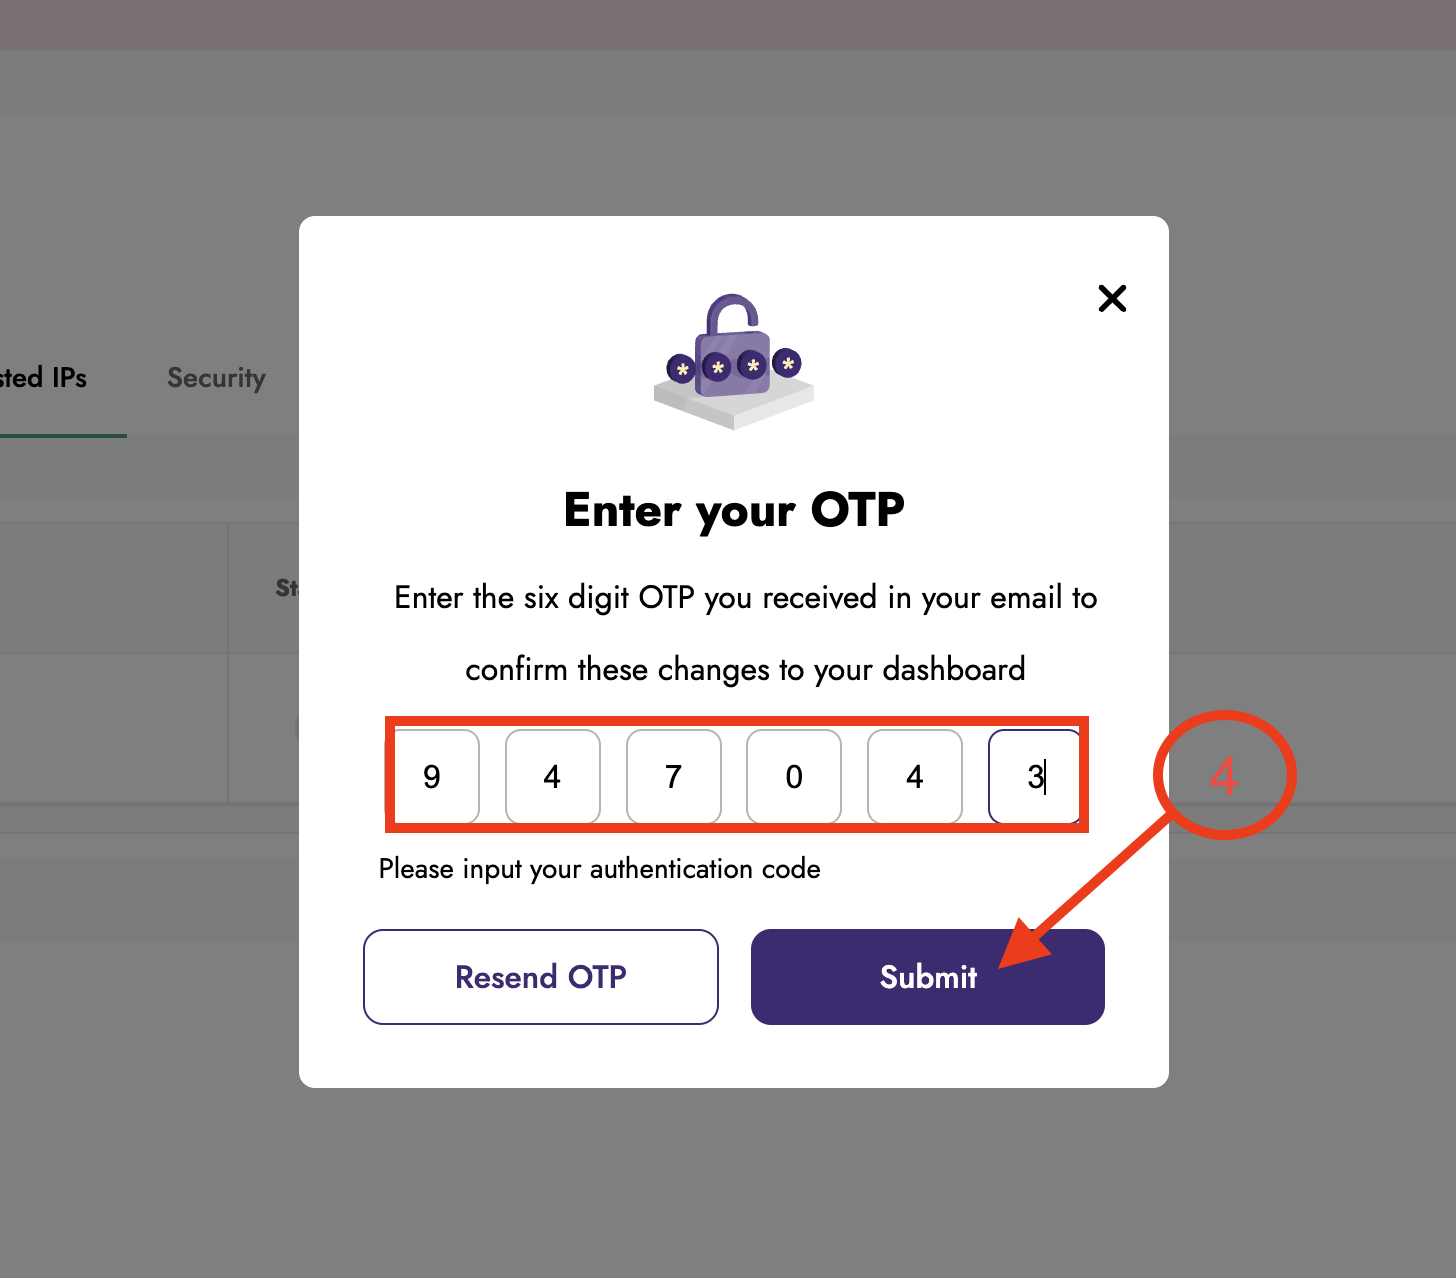
A six-digit OTP code is sent to your registered email address, enter the six-digit code in the boxes provided, then click Submit.
Once the address is removed, an "IP address deleted" notification appears at the top of the page. Click Okay to dismiss it.
You have successfully deleted a whitelisted IP address.