How to Manage Notifications and Approvals on the Treasury Portal
Last updated: September 24, 2026
This guide explains how to manage notifications and approvals on the Treasury Portal. The Notifications section is your central hub for managing transaction approvals, letting you view and act on pending approvals, expired requests, rejected approvals, and your own submitted requests.
The Notifications section organises requests into four categories:
Pending Approvals: transactions awaiting your action.
Expired Requests: approval requests that passed their deadline.
Rejected Approvals: requests that were declined.
My Requests: transactions you submitted for approval.
Follow the steps below to approve a transaction:
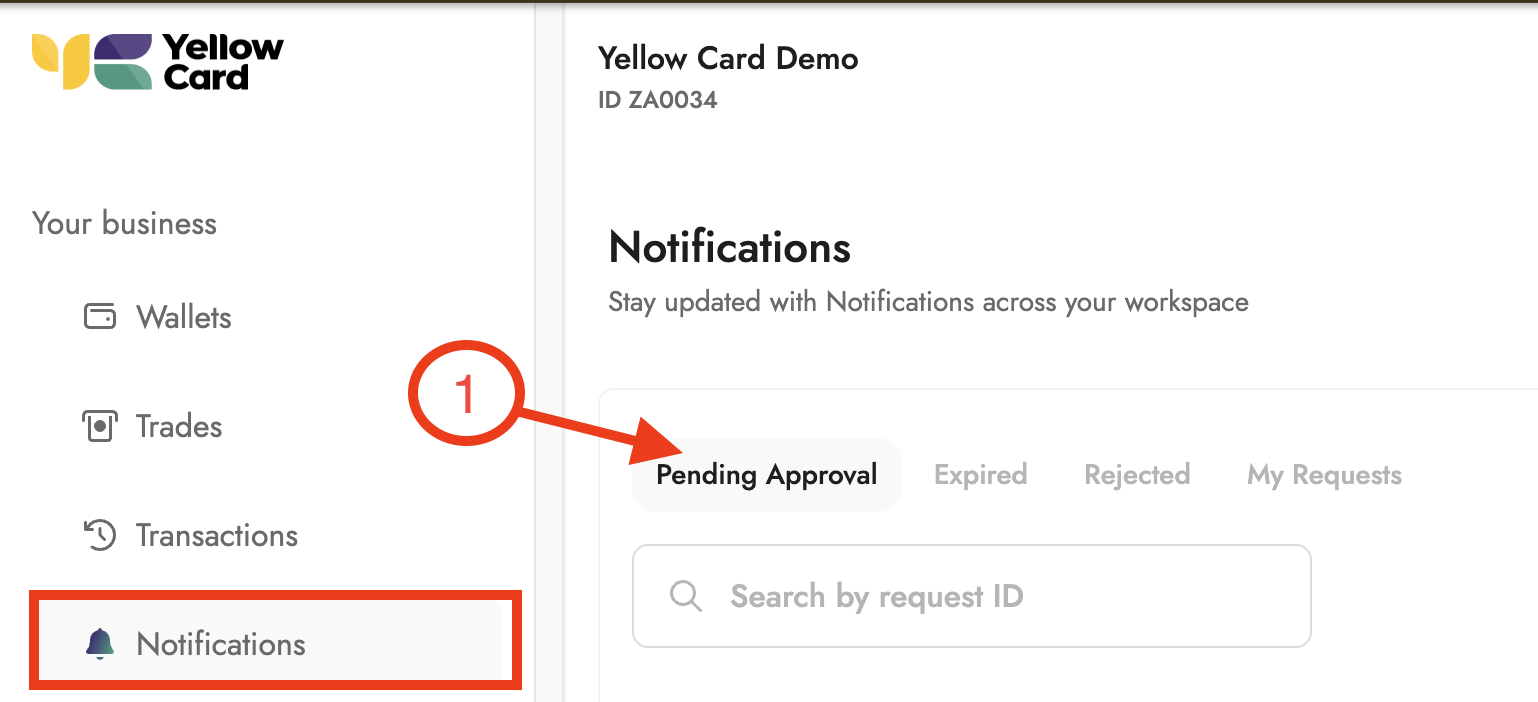
Log in to the Treasury Portal, select Notifications from the dashboard, and click Pending Approvals.
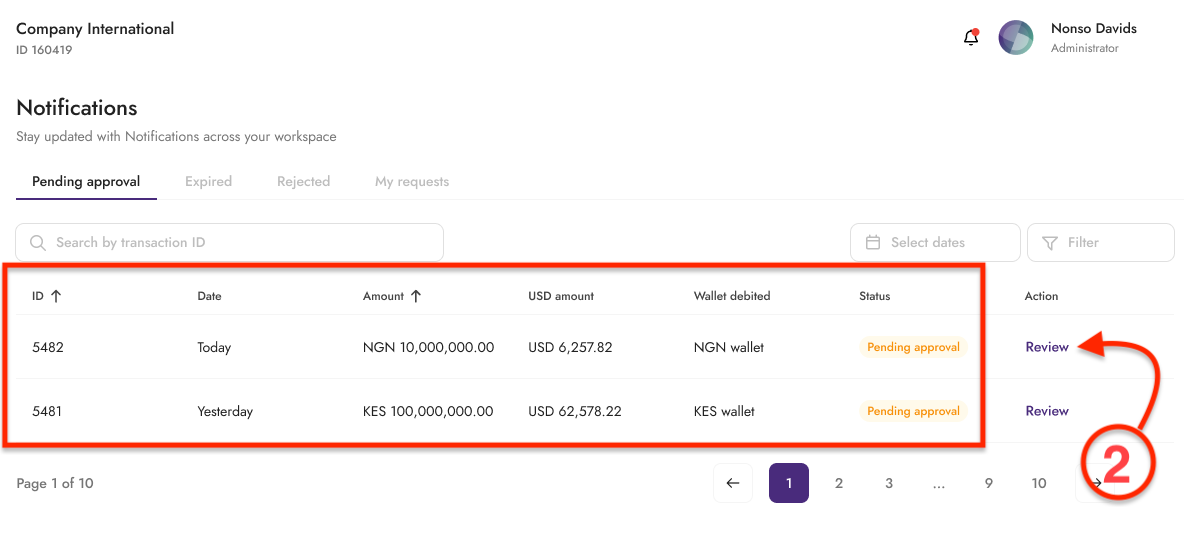
Select the transaction you want to approve and click Review.
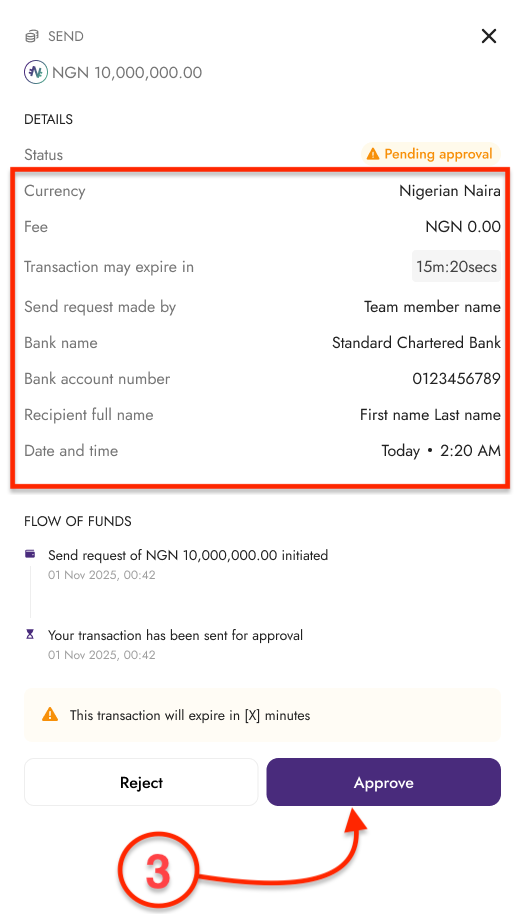
In the pop-up window, review the transaction details and click Approve.
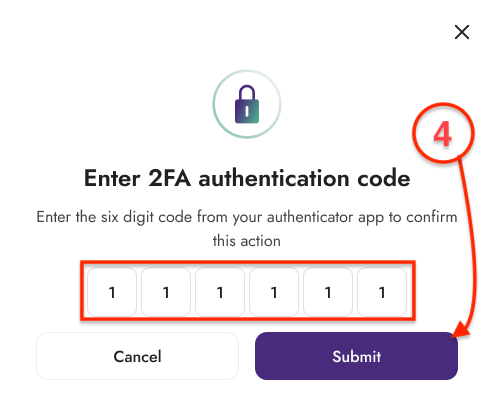
Enter your 2FA authentication code and click Confirm.
Follow the steps below to reject an approval request:
Log in to the Treasury Portal, select Notifications from the dashboard, and click Pending Approvals.
Select the transaction you want to reject and click Review.
In the pop-up window, review the transaction details and click Reject.
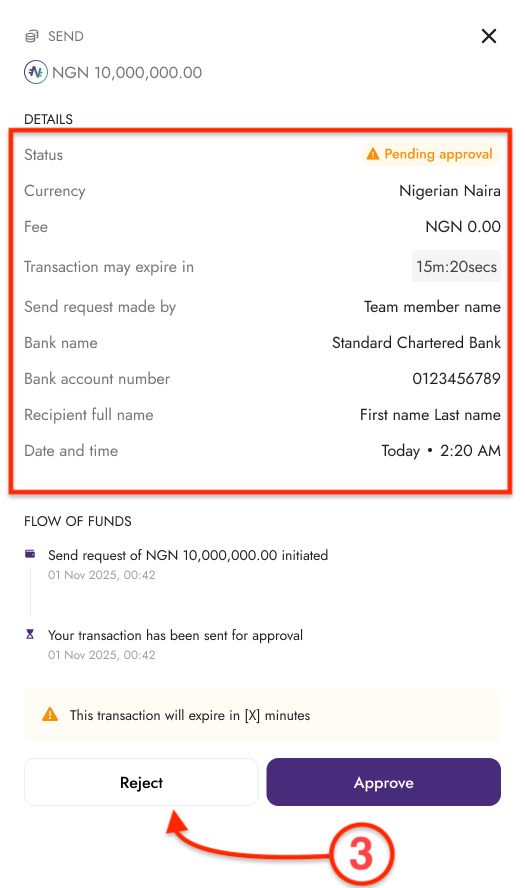
Enter a reason for the rejection and click Reject to confirm.
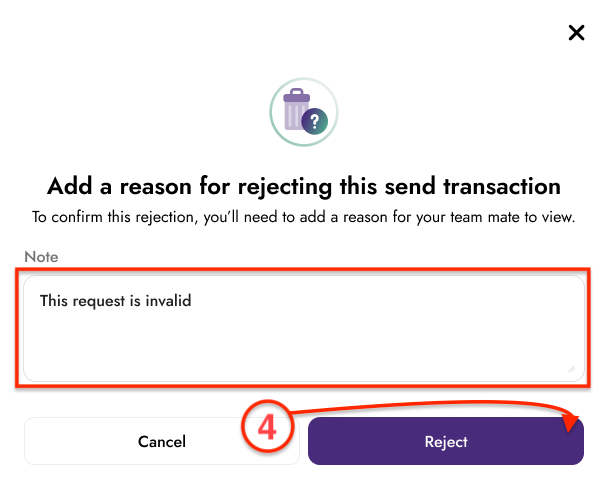
The requester receives a notification of the rejection, along with the stated reason.